Learn how a machine learning algorithm can produce a beautiful wall decoration.
by Zack Akil
Hollywood has made many big promises about artificial intelligence (AI): how it will destroy us, how it will save us, and how it will pass us butter. One of the less memorable promises is how cool it will look.
There's a great example of amazing AI visualization in Avengers: Age of Ultron when Tony Stark's AI butler Jarvis interacts with Ultron and we see an organic floating network of light morphing and pulsing. I wanted to make something similar to fill blank space on my apartment wall (to improve upon the usual Ikea art). Obviously, I couldn't create anything as amazing as Jarvis as a floating orb of light; however, I could use a machine learning algorithm that looks interesting with quirky data visualization: a neural network! It employs biologically inspired elements that were meant to replicate how (we thought) the human brain works.
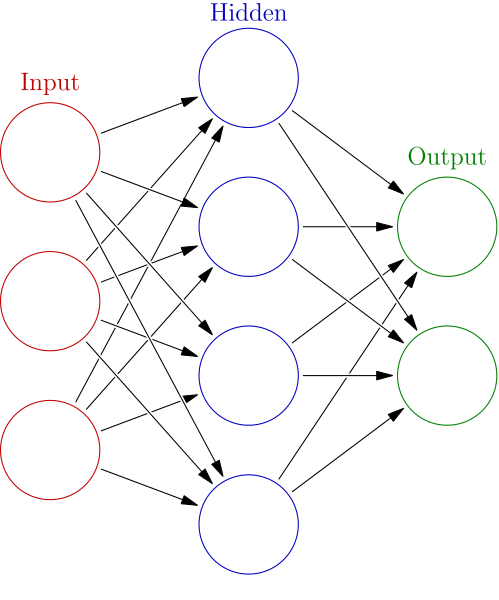
Neural networks in machine learning are inspired by biological neurons in the brain. Each node in the network is connected to other nodes in the network. As a signal flows through it, the connections between the nodes alter the signal until it reaches the end of the network. The specific way that the connections adjust the signal is learned during the algorithm's training phase.
Neural network algorithm structure, Glosser.ca, CC BY-SA 3.0
I set about recreating a neural network with light. For the nodes, I printed custom shapes on a 3D printer in a semi-transparent plastic. For the connections between nodes, I used what's known as side-glow fiber optic, which is normal fiber optic tubing that emits light along the length of the tubing (it looks very sci-fi).
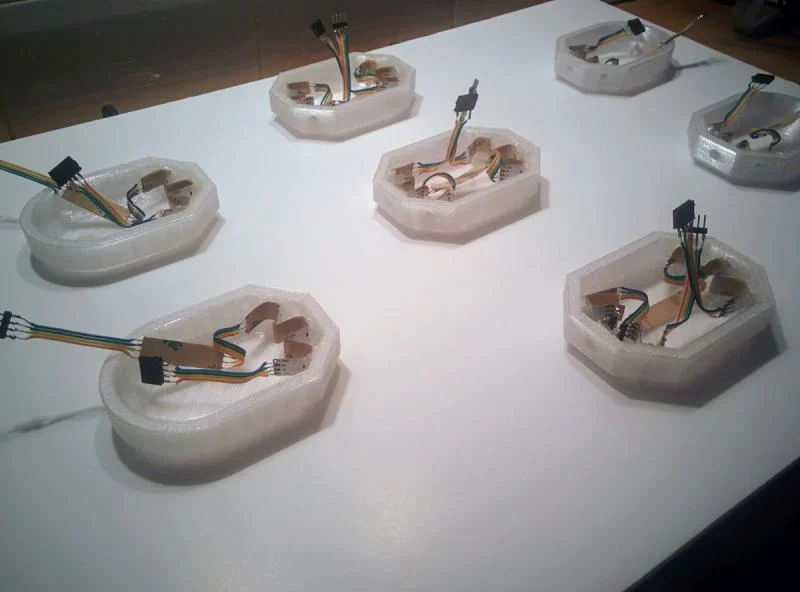
The fruits of painstaking soldering and glueing, Zack Akil, GPLv3.
(You can view more images from this project in the GitHub repository.)
The light source was an RGB LED strip that was laboriously cut, soldered, and glued into each node. (Each node took about 30 minutes to fit with the electronics.)
The component that tells the LEDs what to do is an Arduino board, and that it is told what to do by a little Raspberry Pi Zero, which makes the whole thing WiFi connected.
Now, how does it work? The light network is a glorified WiFi lamp. The real AI is running on a laptop connected to the same WiFi network. I wrote a handy bit of code that plugs into my standard neural network programming environment, and while I train my algorithm, it sends the connection values (green = high value, red = low value, blue = near zero) to the light network in real time. Then I get to see my neural network learning.
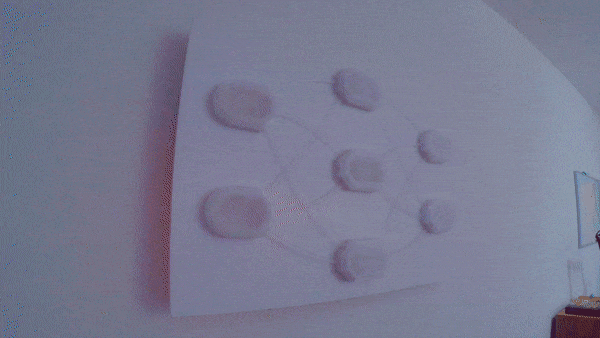
Voilà! A physical light visualization of AI learning! Zack Akil, GPLv3.
It will now live happily on my wall as an illuminating symbol of AI!
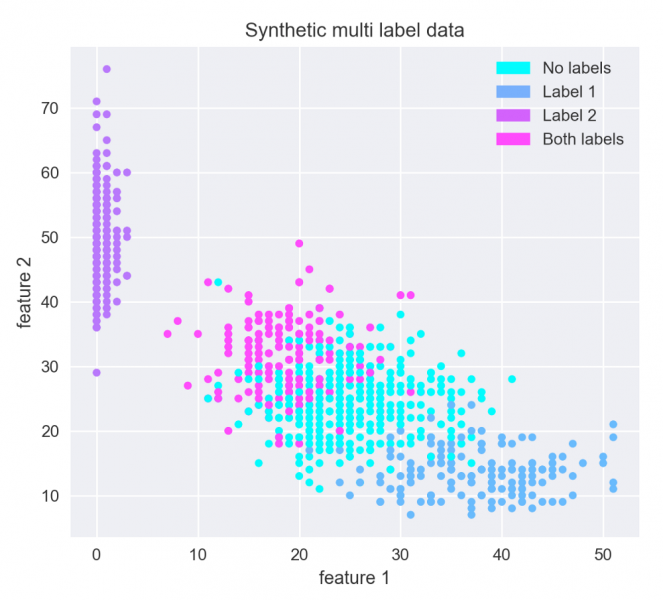
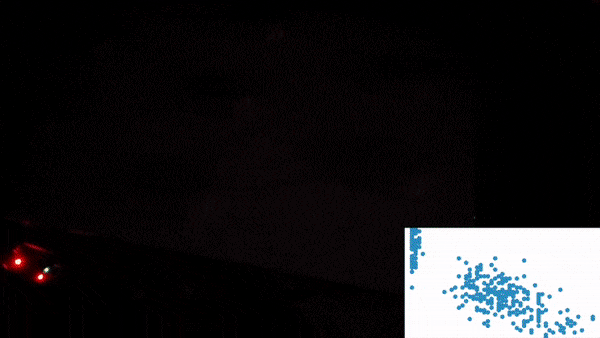
Data that the neural network is learning from, Zack Akil, GPLv3.
This graph shows the data pattern that the neural network is trying to replicate. Based on just the X and Y values (feature 1 and feature 2 in the graph), the neural network will try to output the correct classification (the colour in the graph). Below is another animation that shows the light network learning alongside its prediction of the data. As you can see, the colours of the data points evolve until they closely match the original data. This is learning!
The light network learning alongside its live predictions for the data, Zack Akil, GPLv3.
If you'd like to learn more, including getting all of the nitty-gritty technical info and accessing the code and more images, please visit rgb-neural-net repository on GitHub.


